This user has no description yet

elaineyyyyy
This guide is based on the author's personal experience and is only relevant to the current game’s content.
Hello everyone,
As you may well know, one of the most important daily activities you can do in the game is to do rebel leaders. In this guide, I will go through, what rebel leaders are and how they work, how to maximize your rebel killing potential, and finally I will give some recommended setups for different commanders:
What are Rebel Leaders and how do they work?
Rebel Leaders are the little commanders on horses you see wandering around the world map. You can attack them by using Motivation* which will vary depending on a few factors (see below). When you attack a rebel leader, regardless of how much damage is done, an assortment of items will be randomly given. These items can include basic resources (gold, stone, etc.), speed ups, diamonds, truces, precise and random transfers, and lord equipment corresponding to the type of leader. Upon killing a rebel leader, you will automatically grant all members of your alliance a gift based on the level of the rebel leader you killed (lvl 1 = grey, lvl 2 = green, lvl 3 = blue, lvl 4 = purple, lvl 5 = gold).
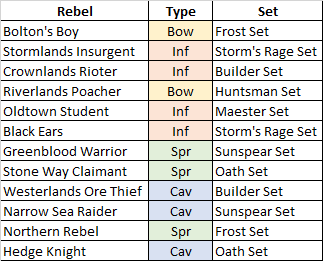
It is important to note that each rebel leader has a particular troop type associated with it, and just like with other battles, by countering the troop type, you receive a buff to your attacks. A list of the different types of rebel leaders, their type, and their corresponding equipment set is included below. Please note that most sets are divided among two different Rebel Leaders, in most cases, of the 6 pieces of equipment, 3 will have pieces dropped by one leader, 3 by the other.
Where can I get Motivation?
Motivation is the basic currency for killing rebel leaders. Motivation is passively gained whether online or offline at a set amount. This ‘Motivation recovery’ amount can be increased by:
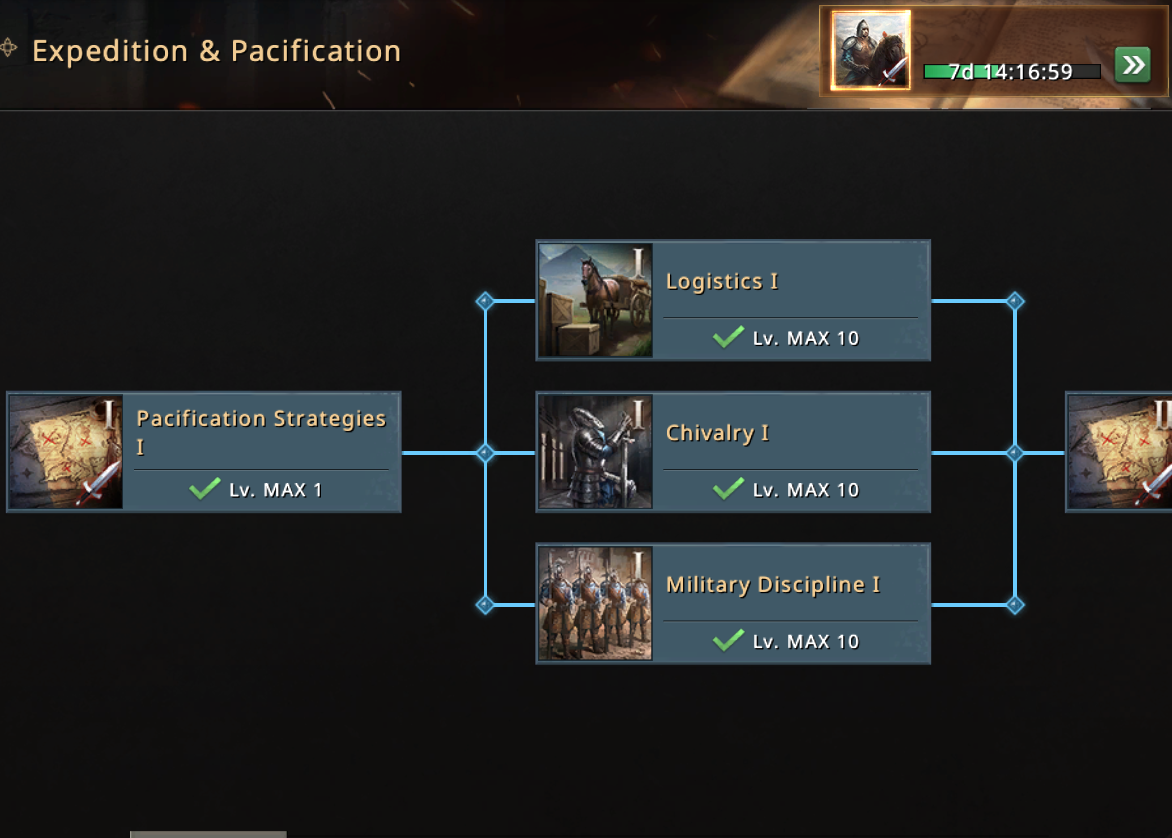
- Research → Logistics I and II
- Increasing your Warehouse Glory Level
- Refinement slots
But it cannot go over a certain max amount. This ‘Motivation limit’ can be increased by:
- Research → Chivalry I and II
- Castle Skin → Dunes Fort
- Marching Animation → Kingdom Elite
- Lord Equipment → Mountain Clan Set
- Haley Awakening
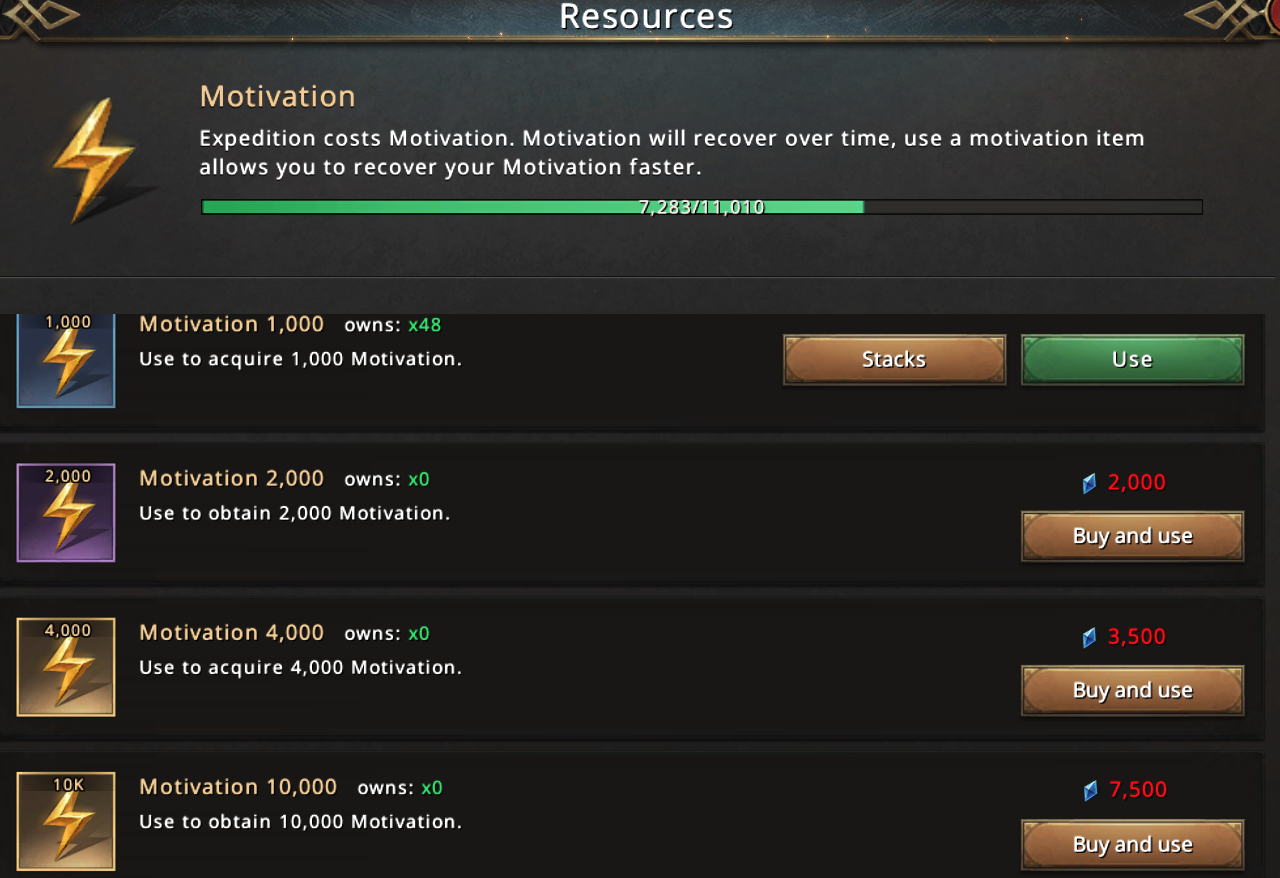
Motivation can also be purchased:
- 1000 Motivation may be purchased in the VIP shop for 625 Blue Diamonds daily
- Can purchase through the motivation inventory screen, but it is more expensive than buying through VIP. Note that you can only purchase one 10K, one 4K, two 2K, and two 2K. Prices seen below. This is a limit on the total amount you can purchase each day, you cannot buy unlimited motivation, so it is important to use this wisely!
What do the levels mean?
You can only unlock the ability to attack higher level rebel leaders by unlocking the corresponding research → Pacification Strategies 1-5. The higher the level rebel leader means the harder it will be to kill that leader, the more expensive it will be to attack him, but the better the item drops will be both for you attacking, and for your alliance when you kill it.
It costs:
600 Motivation to attack a lvl 1 Rebel Leader
1000 Motivation to attack a lvl 2 Rebel Leader
1600 Motivation to attack a lvl 3 Rebel Leader
2800 Motivation to attack a lvl 4 Rebel Leader
3600 Motivation to attack a lvl 5 Rebel Leader
But this ‘Motivation cost reduction’ can be reduced through:
- Research → Military Discipline I and II
- Lord Equipment → Mountain Clan Gear
46.36% reduction (39% from max research, 6.36% from purple MC gear, 1% collection bonus on gear):
321 Motivation to attack a lvl 1 Rebel Leader
536 Motivation to attack a lvl 2 Rebel Leader
858 Motivation to attack a lvl 3 Rebel Leader
1501 Motivation to attack a lvl 4 Rebel Leader
1931 Motivation to attack a lvl 5 Rebel Leader
For anyone wanting to know how to calculate the way the reduction works: new motivation = base motivation *(1-reduction%). So for example: for a lvl 1: 600*(1-.4636) = 321.
While there is some heartfelt discussions among many about which is the most efficient to attack, generally there is some agreement that what is best for the alliance is to always attack the strongest RL you reasonably can because there is a limit on how many alliance gifts anyone can hold at a time, so by only having gold and purple gifts, it hopefully means that no room is being wasted by gray and green gifts. General sentiment is that
if you cannot 3-shot a lvl 5 RL, kill lvl 4s;
if you cannot 2-shot a lvl 4, kill lvl 3s;
note: if you can 1 shot lvl 4s, many feel that is better than 3-shotting lvl 5s (if you can 2-shot a lvl 5, always do that)
if you cannot 1-shot lvl 3s, kill lvl 2s
If you cannot 1-shot lvl 2s, kill lvl 1s.
Many individuals have researched and found that if an entire alliance of 100 members kills 3 or more lvl 5 rebel leaders each day (between 300-400 gold boxes daily) that should equal out to a fairly break-even amount of diamonds in terms of the additional diamonds coming in from the boxes being roughly equal to the diamonds that must be spent to purchase additional motivation each day, but while also adding a large injection of speed ups and other resources in the meantime.
What about the rest of the research?
While some of this will be a repeat to recap the different aspects of Research:
- Military Discipline I and II → Motivation Cost Reduction (39% total)
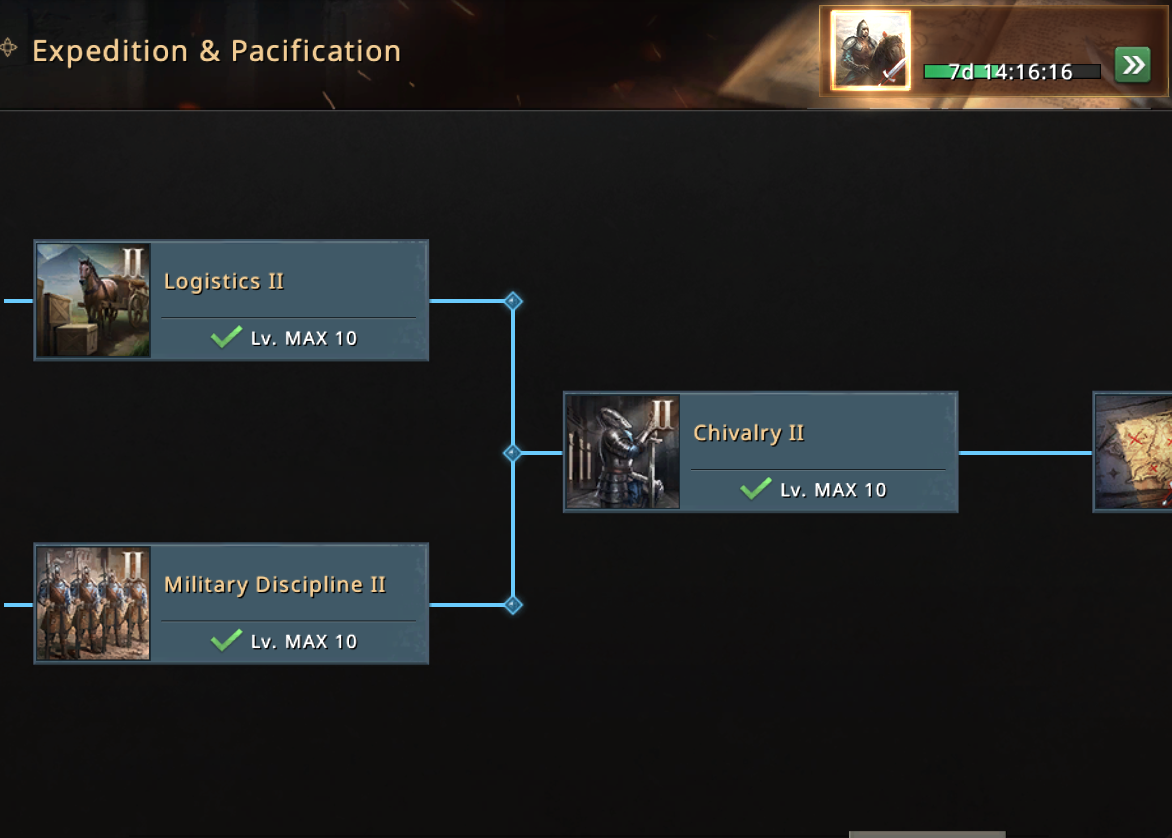
- Logistics I and II → Motivation Recovery (51% total)
- Chivalry I and II → Motivation Limit (4450 total)
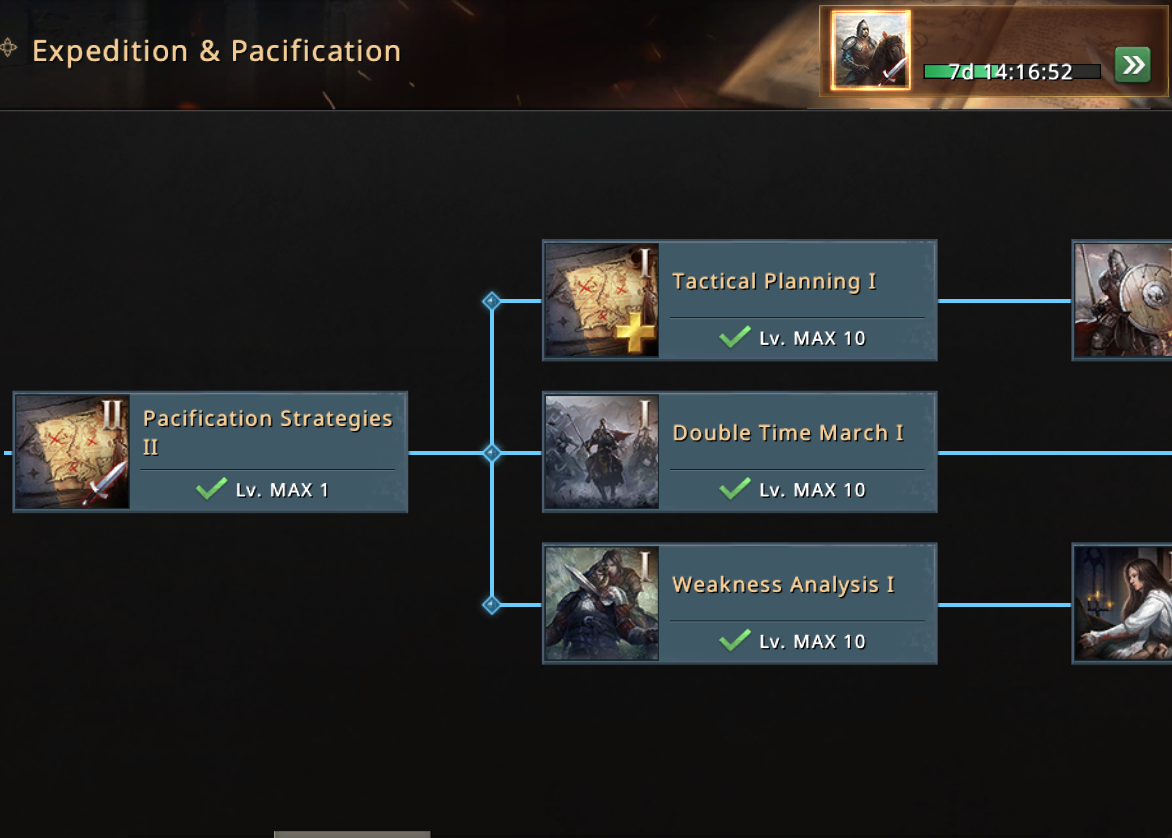
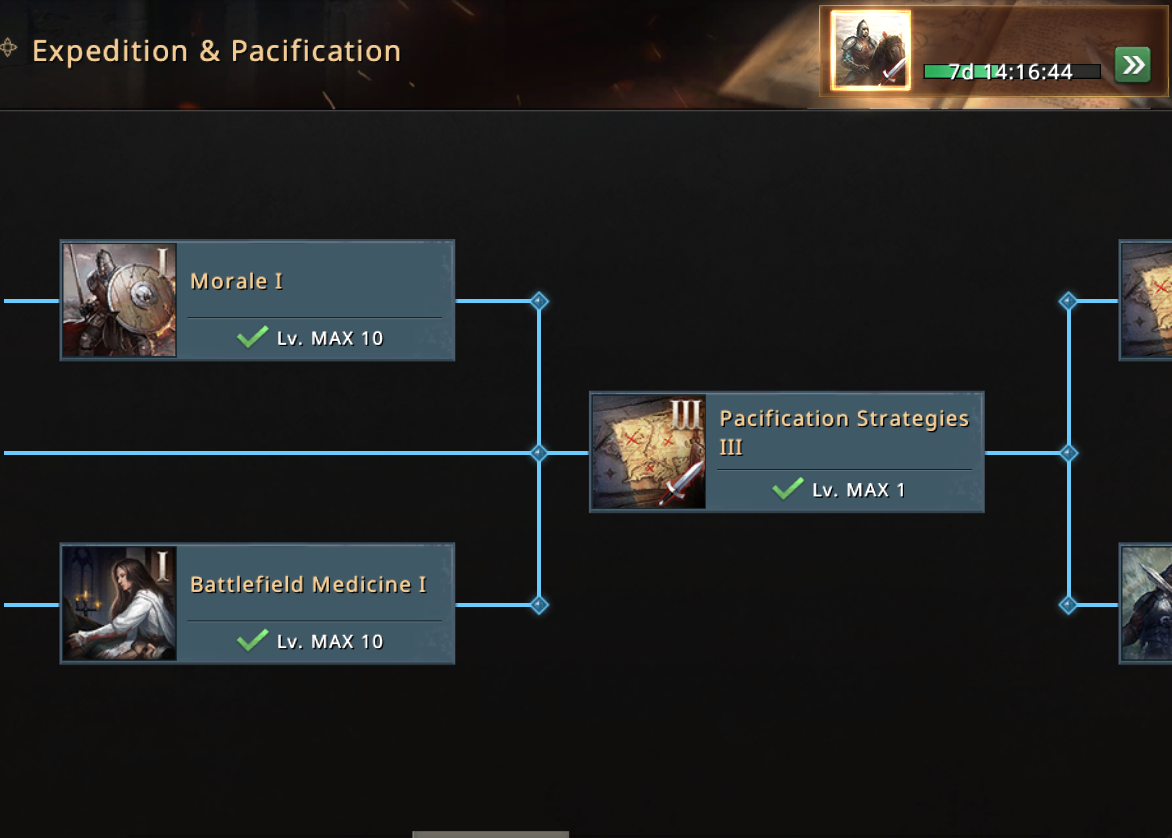
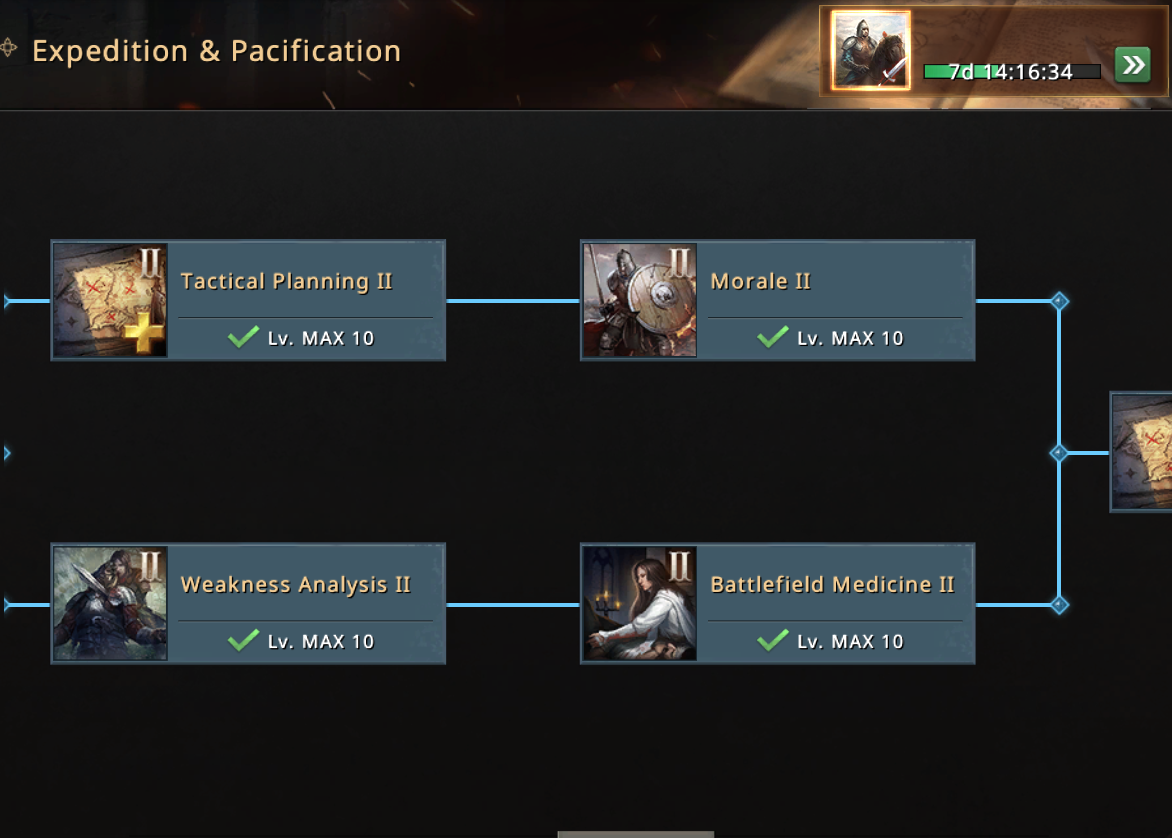
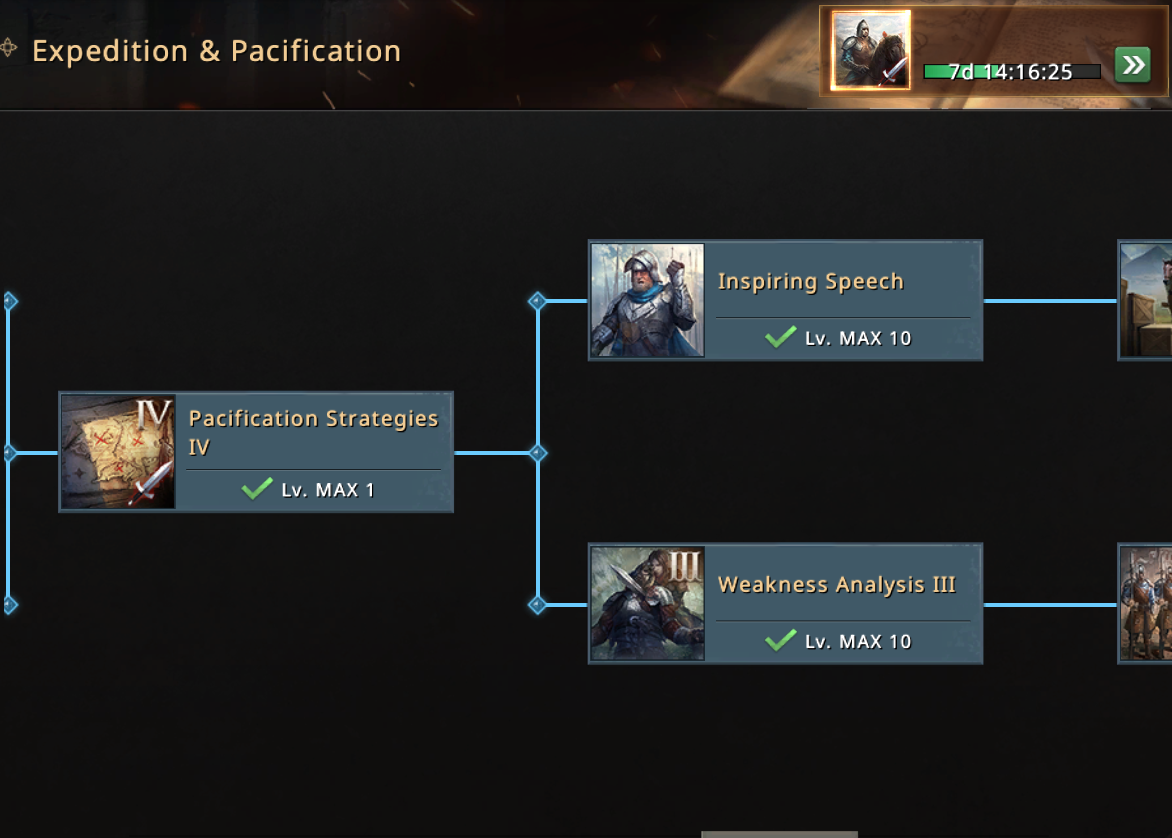
- Weakness Analysis I, II, and III → Damage Dealt (90% total)
- Inspiring Speech → Initial Might (650 total) → This means your commanders will use their first ability sooner in battle.
- Morale I and II → Expedition Army Health (44.75% total) → This means your commanders will stay alive longer
- Battlefield Medicine I and II → Expedition Heal Effect (47% total) → This means your commanders will heal more in battle
- Tactical Planning I and II → Expedition Combo Cap (+20 total) → How many times you can repeatedly hit a rebel leader and get bonus damage (see below)
- Double Time March I → Expedition Marching Speed (28% total) → Arrive quicker to battle
How to maximize your Rebel Leader Killing Potential
There are a number of places in which you can boost your ability to kill Rebel Leaders:
- Research → 90% from Expedition Tree
- 30 minute buff (25% expedition attack or 50% expedition attack)
- Lord Equipment → Mountain Clan Set (Max 100% + 5% collection)
- Castle Skin → Dunes Fort (20%), Watcher’s Oath (20%), Last Hearth (25%) → all can be increased by 12% more by leveling up your castle.
- Marching animation → Kingdom Elite (20%)
- Honor Badge (20%) + bonus drops!!!
Attack one at a time: There is an option to do a single attack or to attack multiple times at once, it is important that you always attack one at a time because with each successive attack you stack “combo” hits.
Your first hit does base damage
Your second hit will do +14%
Your third hit will do +24.5%
You should never be taking more than 3 shots to kill a RL, but it will continue to rise!
Recommended Lineups:
Before I give these recommendations please accept the following caveat:
- Certain commanders deal damage dependent on their health, skills, and other factors, these result in there being a fairly wide variance when using these commanders
- Rebel Leaders are not all equal, some are stronger than others even within the same troop type. This appears to change frequently, and is why your own trial and error will likely be more fruitful and more updated than this guide can ever be. Additionally, it appears like sometimes rebel leaders get randomly stronger from patch to patch, there is little evidence aside from the anecdotal of this occurrence.
With that lets get into how to approach recommending lineups. The important thing here is that we need to stay alive while maximizing damage, and the most common way to do this is to have 1 tank, 1 buff, and 4 damage dealers. Typically you want to have a tank and damage dealers to counter the enemy type. So, for example, against Infantry, use cavalry tanks like Robb, Salma, Winton, etc. and damage dealers like Mengo, Merrell, Leila, etc.
But, there are a few exceptions to this rule, they are: Theon/Shiela, Enzo, and Jeane. I will talk about each individually:
- Theon/Shiela - These are two of the highest DPS commanders in the game, if they are gold and properly leveled up, they should be in every lineup based on their damage output alone, even though they don’t counter any melee types.
- Enzo - Enzo’s ability (dealing damage based on missing % health) essentially transformed rebel leaders because it opened up a possibility of getting Enzo really low on health and triggering his ability, but then keeping him there where he does high damage. This introduced using commanders like egbert and others instead of Jeane so that they could give Enzo a massive shield and ensure that he doesn’t gain or lose any more health for the rest of the match. → Depending on how strong Enzo is greatly affects how this should be played, but Enzo is practically a must use in RL setups if you can master his ability.
- Jeane - Jeane heals and grants an attack buff, she is the ultimate healer and utility, unless you are using Enzo, you should always have Jeane in your lineup.
So… with these exceptions… here are my recommendations (again bearing caveats in mind):
Vs. Bows:
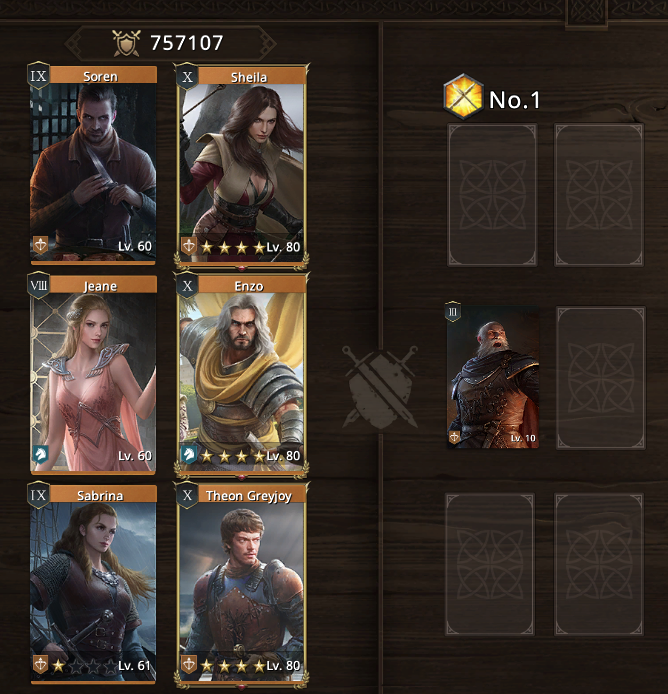
As you can see, there are a few different good options here. I believe that a lot will depend on: how strong your different commanders are. I hope that this gives you all a good sense of things to try and what will likely work best for most bowmen commanders.
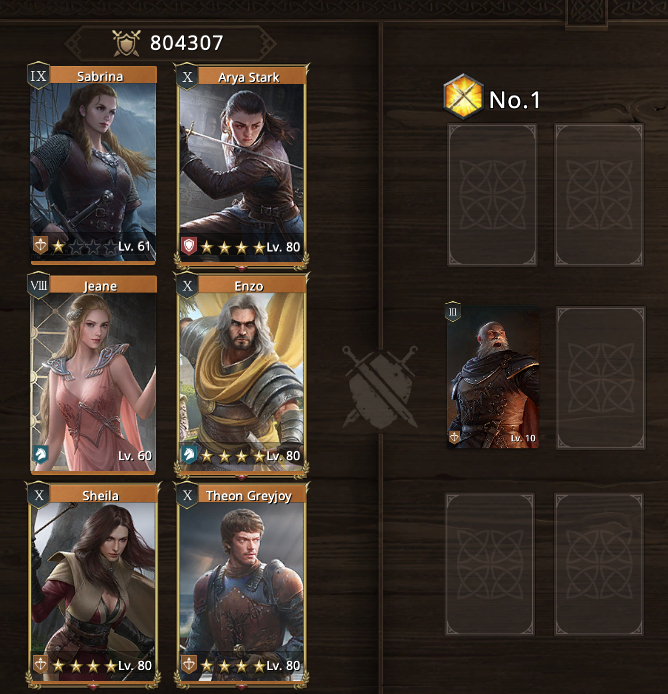
Vs. Inf:
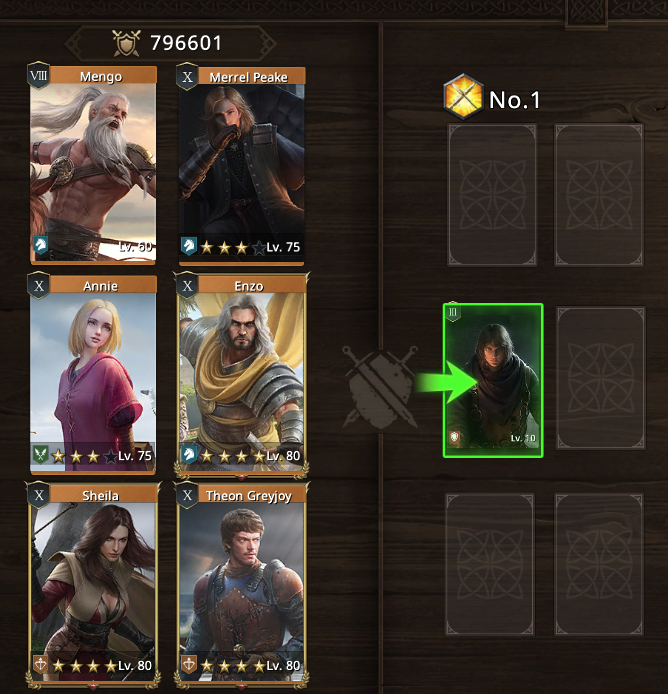
(Rec. lvl 4 or weak* 5)
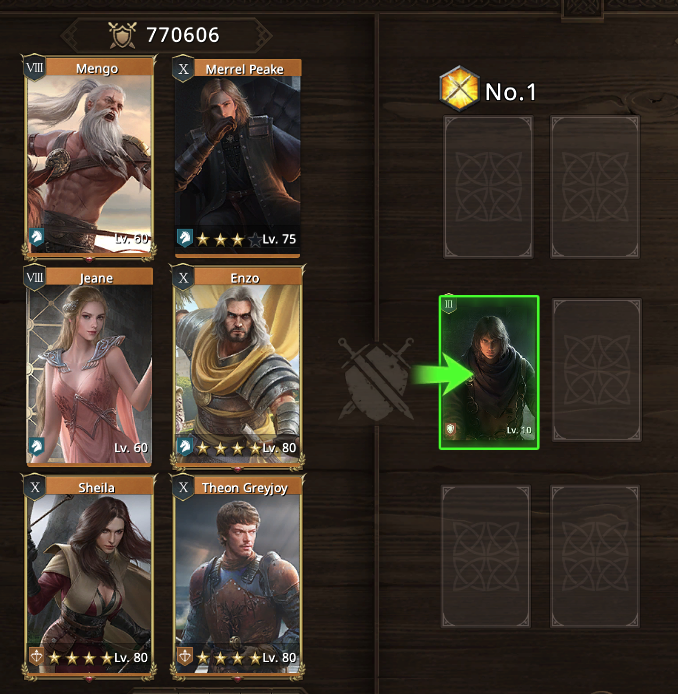
(Rec. strong lvl 5)
This one is pretty easy, I have found that even a fully awakened, lvl 80 Leila is not as strong as merrell, mengo, or sheila. I don’t have a great explanation for why aside from it just works that way. You may want to play around with Annie vs. Jeane, a lot depends on which type of RL and how strong your Enzo is. Against a non-lvl 5 RL, it also may affect the damage and type of healer (or sometimes no healer) that will be necessary.
As you can see, I reference “weak” and “strong” level 5s. All that is meant by this is that some rebel leaders are stronger than others, for example Oldtown Students tend to be “strong” meaning you should use annie for lvl 4s, and jeane for lvl 5s. But for Stormlands Insurgents, they tend to be weaker, so I would use Annie for lvl 4 or 5s.
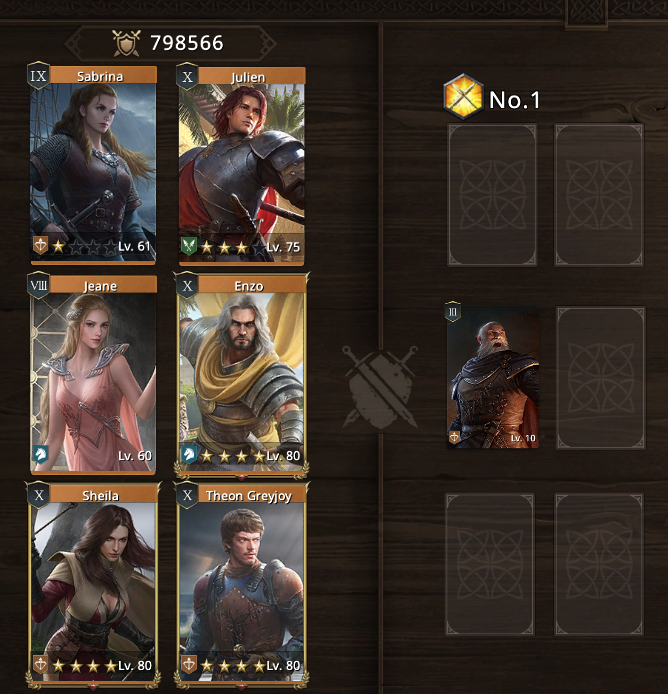
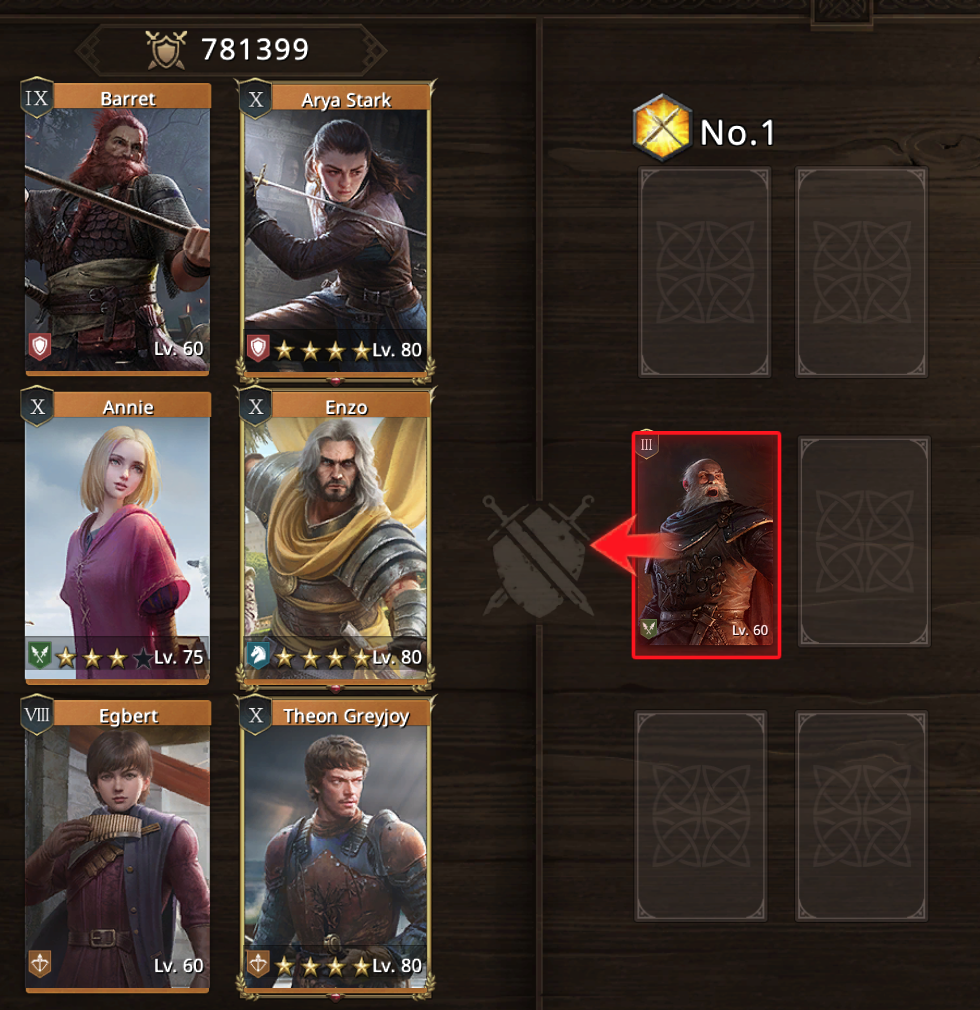
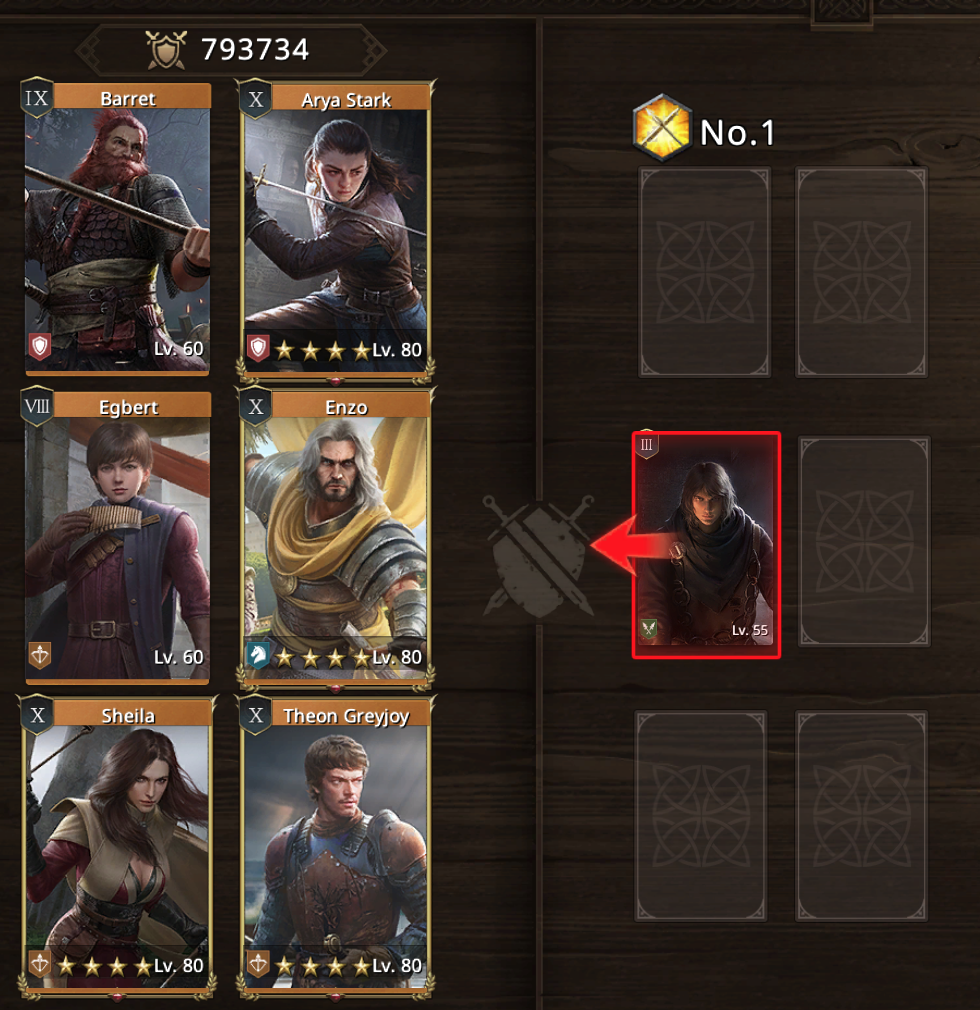
Vs. Cav:
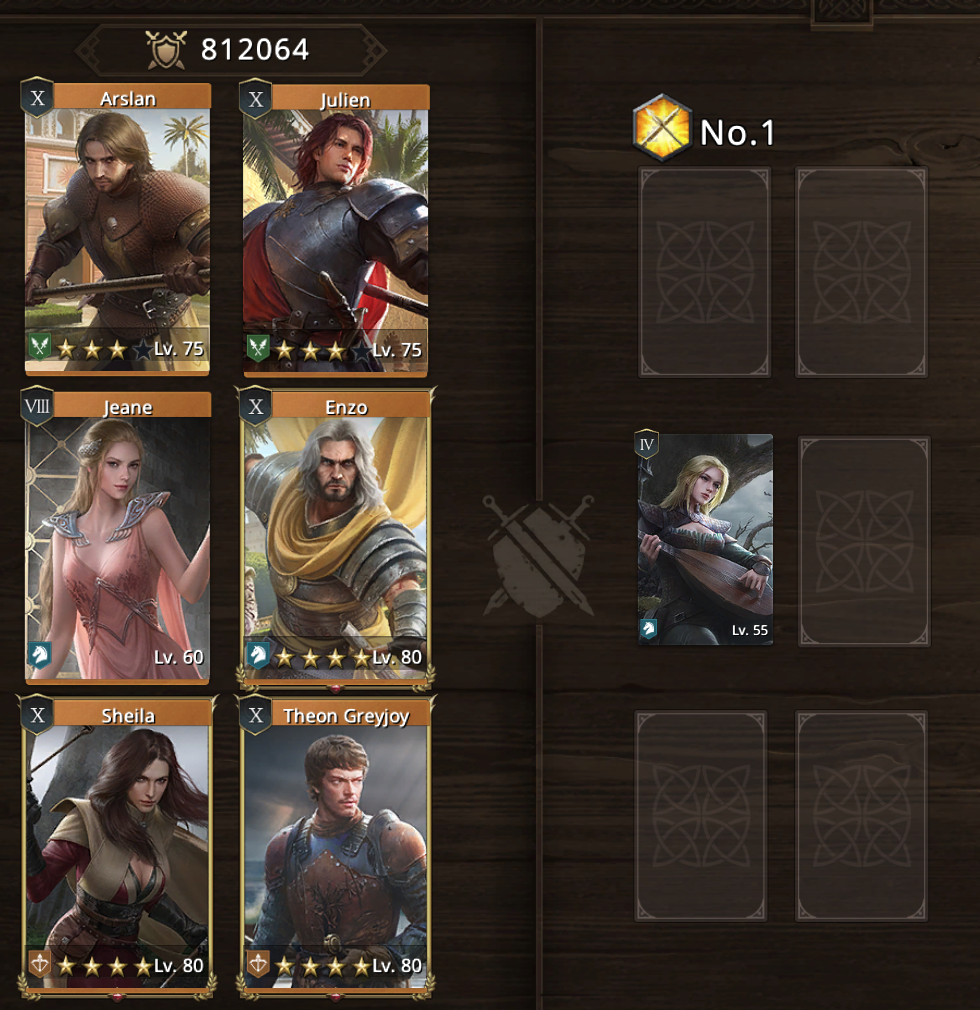
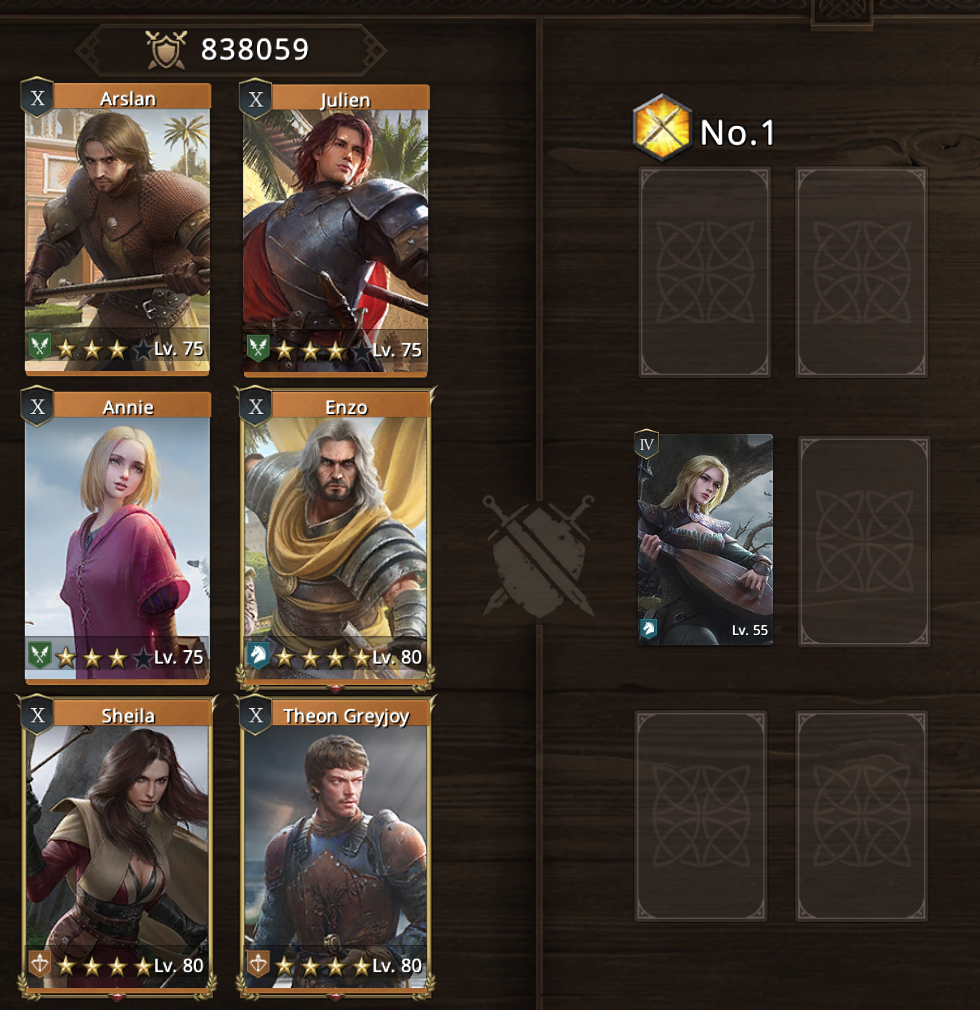
(Rec. Lvl 4)
Another one that is fairly straightforward. Jeane is usually perfect here, but annie can work as well at times. Julien and Arslan are far and away two of the best damage dealers you have. Many people use Julien in other lineups, but I personally only use him against Bows and Cav. With this setup I am usually pretty comfortably able to one-shot lvl 4 RLs - see photo below:
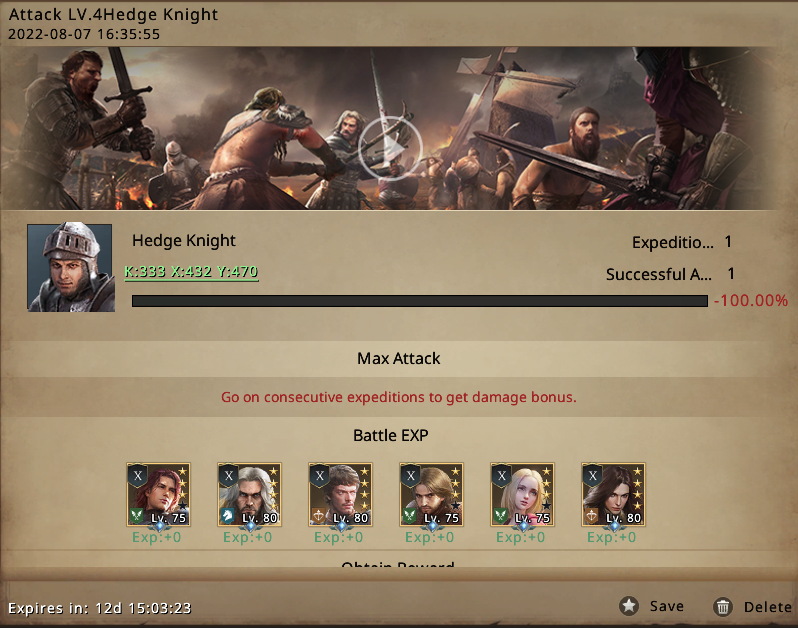
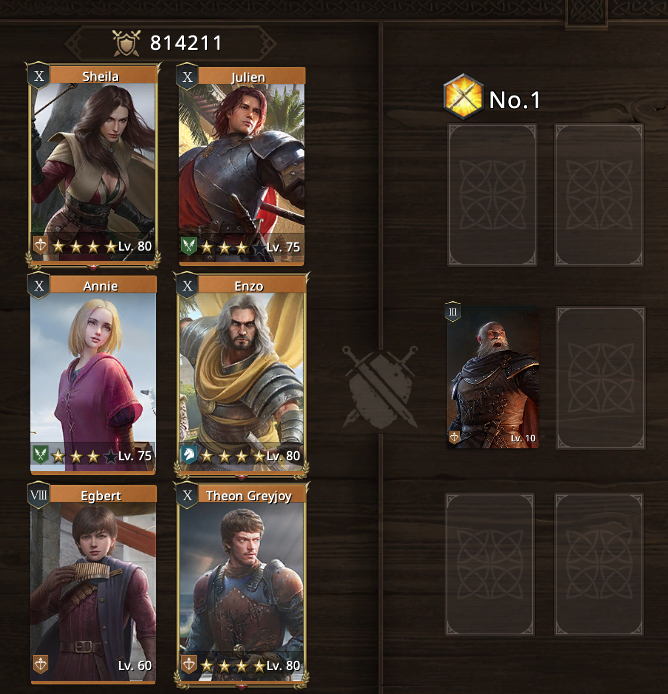
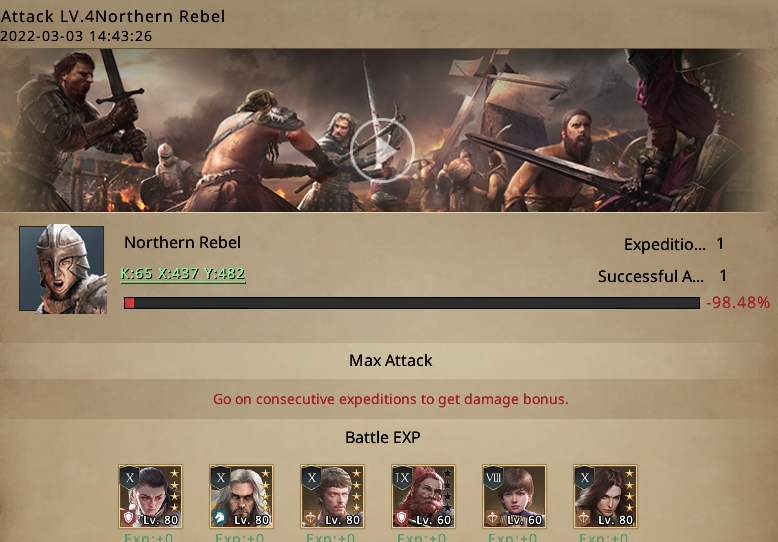
Vs. Spear:
(Rec. Lvl 5)
(Rec. Lvl 4)
Fighting Spear RLs gets interesting because Enzo dies so much quicker. Almost always expect to use Egbert here, then beyond that Arya and Barrett are obvious choices as massive infantry damage dealers. There is potential to throw in Jeane or Annie if you have a weaker Enzo or against lvl 5 or other stronger RLs. This setup is often able to 100% a lvl 4 RL, as you can see how close you can come in the photo below:
Thanks for reading this guide,hope it will help you~!
Translate

elaineyyyyy
This user has no description yet
Popular Posts
1
![[Player Guide] Awakening Synergies and Counters](https://oss.gtarcade.com/forum/png/2021-09-03/8644_f2507237-4887-4812-948f-33f3ffd49118_192522.png?x-oss-process=image/resize,w_150,h_150)
[Player Guide] Awakening Synergies and Counters
423 discussions 13.7K views
2
![[NEWS] Alliance Conquest matchmaking and changes (Updated on 2022/11/23)](https://lh5.googleusercontent.com/ATo-IVGnilaHnG5LLK5kvnlYULtpGQQKICTVAyP2aVa0zMLXL12riri3T328meEo7aisMpHqX8wMozel9YpKd84bkGRqj7QK-LRJqx-kD_nh7q3-Zj0wBb74D83MPsaRGbbnyDclMeqaFkfmW1ccxZXAnuYRSu1Ju3qRHyQG0liQNTHTfcYh23xJi98tag?x-oss-process=image/resize,w_150,h_150)
[NEWS] Alliance Conquest matchmaking and changes (Updated on 2022/11/23)
263 discussions 25K views
3
![[PLAYER GUIDE] Gold Production](http://community.gtarcade.com/data/attachment/forum/201909/18/193704twug19cep1q1qj69.png?x-oss-process=image/resize,w_150,h_150)
[PLAYER GUIDE] Gold Production
34 discussions 4K views