This user has no description yet

fictions
💠Introduction
What’s up, folks? Welcome back to my Illusion Battlefield League(IBL) series, where I take a closer look at different matches. The IBL tournament differs from regular IB in that everyone will construct marches and skill builds using a fixed set of skills. At different stages of the tournament, more immortals and skills will become available. Everyone has access to the same immortals and the same skills. Castle skins and Lord Talents do not affect the more fast-paced battles of IBL. Relocations and marching speed are also faster. The event is one of the most entertaining events in Infinity Kingdom, and players enjoy spectating, almost like a sporting event. In this article, I’m going to take a closer look at the match between Server 56’s Hakuna Matata(HMB) and Server 136’s Along With The Gods(AWG). AWG’s positions in this match will be denoted in green while HMB’s will be in red.
💠Table of Contents
- Overview
- Starting Positions and Talents
- AWG
- HMB
- Tower 1
- Tower 4
- Central Tower
- Altars
- Home Towers
- Play-by-Play
- Summary
💠Overview
AWG versus HMB is a clash of two undefeated teams, but their paths to 4–0 have been very different. HMB entered the match at 4–0 and finished 18th in Season 7, yet they have not faced a particularly challenging opponent this season and typically field around 25 to 30 players per week. AWG, formerly MIAU, was also 4–0, did not make the top 64 last season, but now consists largely of the core from Server 105 and regularly fields more than 30 players. Given AWG’s higher attendance and a stronger, more consolidated roster, they should be favored to win this matchup.
💠Starting Positions and Talents
HMB
- Started with 21 players and ended with 27
- 11 Attack talents
- 8 Defense talents
- 2 Support talents
AWG
- Started with 29 players and ended with 32
- 17 Attack talents
- 9 Defense talents
- 3 Support talents
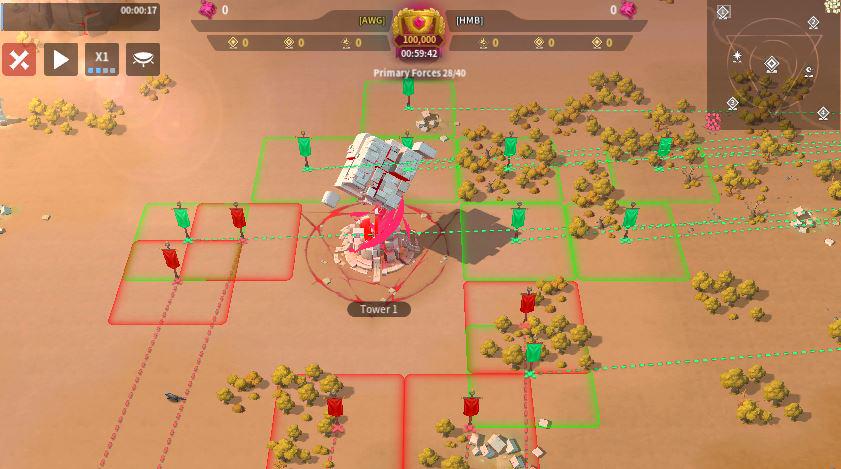
💠Tower 1
At Tower 1, HMB sent six players with one overlap and had a single player contest the bottom corner, while the rest clustered on the bottom side but left gaps between themselves and the tower. AWG committed eleven players, with one overlapping HMB’s overlap and another attempting to block two HMB relocations. AWG’s setup was far more organized and compact, and with a clear numbers advantage and better proximity, they were strongly favored to secure control of the tower.
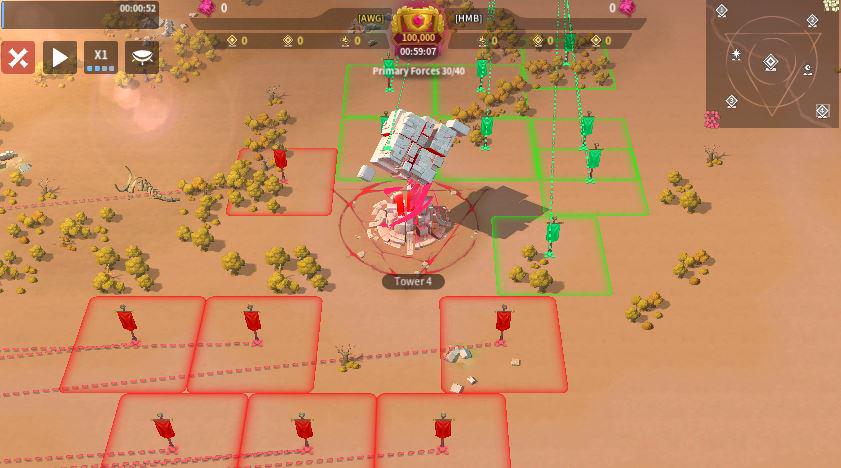
💠Tower 4
At Tower 4, both alliances committed eight players. HMB left a few spots adjacent to the tower open, but their formation was more disciplined than what they showed at Tower 1. AWG had one overlapping relocation and, despite being the top-sided team, lacked strong edge spawns to effectively block HMB’s landings. With AWG clustered in the top corner, HMB ended up with more usable space and better local control around the tower.
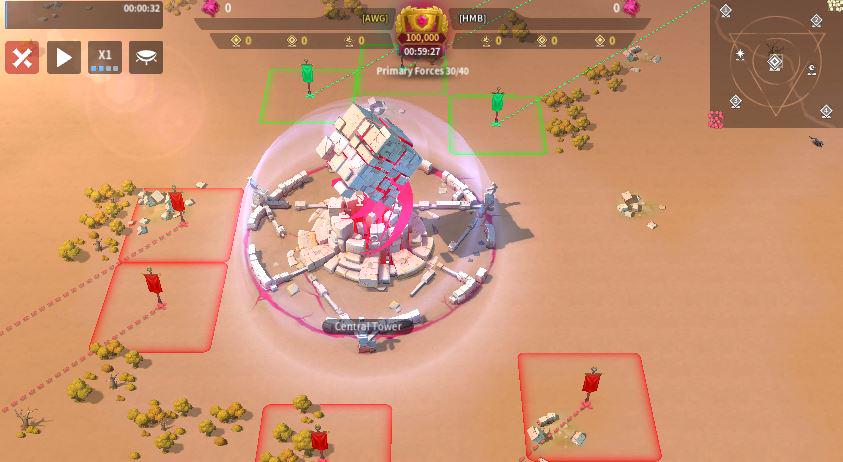
💠Central Tower
At the Central Tower, both teams sent four players. HMB’s formation was spread out, which slowed their ability to rally and garrison efficiently. AWG’s players were positioned more compactly, giving them faster response times and a positional edge around the objective.
💠Altars
HMB sent one player to the Sun Altar and AWG sent two to the Moon Altar.
💠Home Towers
HMB opted to leave their Tower 3 unguarded in the opening minutes. AWG stationed one person at their home tower.
💠Play-by-Play
HMB opened Tower 1 by blocking one relocation, but AWG answered by blocking two of their own, immediately isolating four defenders. AWG transitioned straight into a siege, destroyed another late relocation, and focused down the nearest targets. Two defenders were zeroed in quick succession, allowing AWG to capture the tower at the five minute mark. AWG then zeroed another straggler, and three members immediately rotated toward HMB’s home tower to press the advantage.
AWG opened Tower 4 by quickly eliminating one HMB player, but two latecomers immediately arrived to replace him. AWG attempted to reinforce from spawn with three relocations, though HMB managed to destroy one of them. HMB then flew a target and brought in three more players to stabilize the fight. Both sides worked to deny each other the key first-row spots next to the tower, resulting in a stalled frontline. HMB scored another zero and began to gain some ground, but AWG answered by deleting several defenders of their own and funneling in additional reinforcements. As the fight dragged on, neither team backed off, yet AWG’s steady replacements started to tip the numbers in their favor.
AWG opened Tower 4 by quickly eliminating one HMB player, but two latecomers immediately arrived to replace him. AWG attempted to reinforce from spawn with three relocations, though HMB managed to destroy one of them. HMB then flew a target and brought in three more players to stabilize the fight. Both sides worked to deny each other the key first-row spots next to the tower, resulting in a stalled frontline. HMB scored another zero and began to gain some ground, but AWG answered by deleting several defenders of their own and funneling in additional reinforcements. As the fight dragged on, neither team backed off, yet AWG’s steady replacements started to tip the numbers in their favor.
At the 18 minute mark, HMB relocated to AWG’s home tower while the two guards failed to destroy the incoming relocation. Two additional HMB players teleported in to reinforce the push, and AWG immediately answered with two relocations and teleports of their own. HMB managed to zero three AWG players during the exchange, but AWG continuously replaced losses from their nearby spawn. As more HMB players committed through teleports and relocations, the proximity disadvantage became clear, and HMB could not win the war of attrition. AWG stabilized the defense and ultimately shut down the invasion without losing control of their home tower.
While the fight continued elsewhere, HMB kept sustained pressure on Tower 4. They formed up along the bottom side, activated Quick Occupy talents, and committed fully to the objective. Despite having several players in the area, AWG was caught off guard and failed to stop the capture in time. HMB secured Tower 4 at the 20 minute mark, but by then they were already trailing by roughly 17,000 points.
Despite briefly securing Tower 4, HMB continued to lose ground as AWG steadily outnumbered them in the area. AWG began picking off defenders one by one, and HMB’s presence thinned rapidly. By the 35 minute mark, AWG had deleted most of the remaining defenders and stole Tower 4 back. Around the midpoint of the match, HMB attempted an invasion at Tower 1, but AWG was well positioned and shut it down without much trouble. From that point on, HMB was unable to reclaim a second tower, let alone contest a third, and the match steadily slipped out of reach.
💠Summary
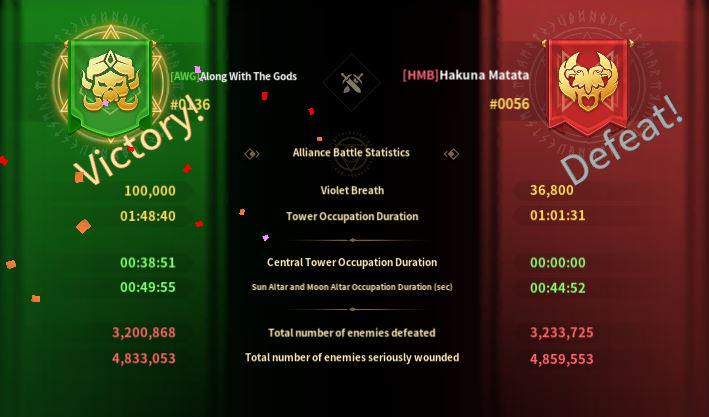
AWG defeated HMB 100,000 to 36,800, with the outcome largely driven by HMB’s poor attendance, which left them on the back foot throughout the match. HMB should have conceded Tower 4 early to overload Tower 1 and the Central Tower, as they were consistently outnumbered at every objective. AWG, recognizing their numerical advantage, correctly chose to contest all three neutral towers rather than cede one. While AWG’s home tower guards were slow to react, their rotations were strong enough to shut down invasions at Towers 2 and 1. The result drops HMB to 4–1 and moves AWG to 5–0.
What matchup do you want to see next? Let me know in the comments below!
💠Related Links
Version 2.9.1
Infinity Kingdom Official Website
#infinitykingdom #hmb #awg #ibl
Translate

Popular Posts
1

Vr rr r3b
193 discussions 204 views
2
Ggrrvev4g4
174 discussions 184 views
3

Who is the best wounding master?
385 discussions 629 views